Once we finished recording the web test we need to
verify that by running the test at least once to make sure it is working
fine without any errors. But before running the test we need look at
the configuration file associated to the test.
Settings for .testrunconfig file
Most of the assembly built in
.NET holds a configuration file associated to it to hold the settings
required for the application. Similarly the test application creates its
own configuration file with an extension .testrunconfig
file. This file is created automatically when we add a new test to the
solution. We can create any number of test configuration files for the
test in the solution but only one configuration can be active.
For
changing the configuration settings for the test, select the
configuration file from the solutions folder and right-click and choose Open that opens the window, which guides us in modifying the settings for the test.
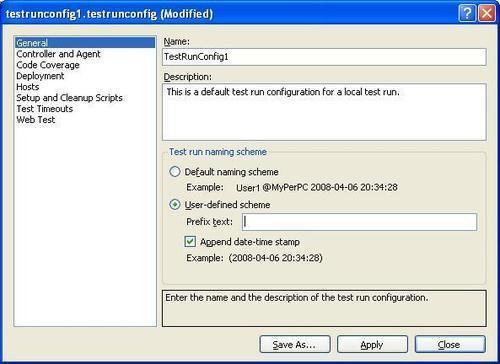
General
The General section contains the settings that are common for the test. They are:
Name: This is to specify name for the configuration file.
Description:
short description of the test configuration. In case of maintaining
multiple configuration files, we can use this field to briefly describe
the changes from the previous settings.
Test run naming scheme:
When the test is run, the results are created and stored under a
specific name in the application results folder. By default the name is
the current windows user name followed by the @
symbol and then the machine name and current date and time. We can
choose the next option which is the user defined schema text. We can
also choose for appending the date time stamp with the user defined
scheme.
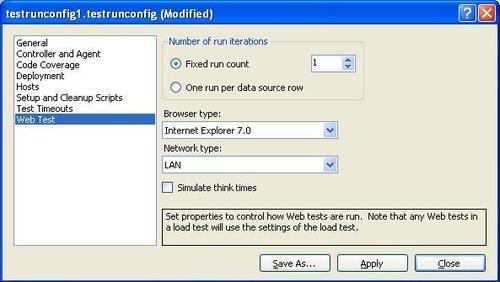
Web test
This section describes all of
the settings required for web testing. These settings are applied only
for the web testing. Some of the properties will be overridden in case
of load testing.
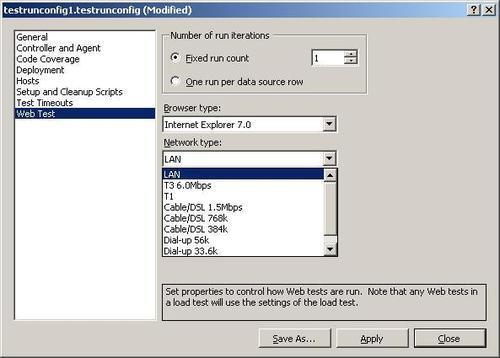
Number of run iterations:
This is to set the number of times the test has to run. There are two
options for this: one is to set it to a specific number of times, which
can be greater than 1.
The second option is to set it to take the number of rows available in
the data source associated to the web test and run once per row. This
property does not apply to load test as the load test is for number of
users and scenarios not for iterations.
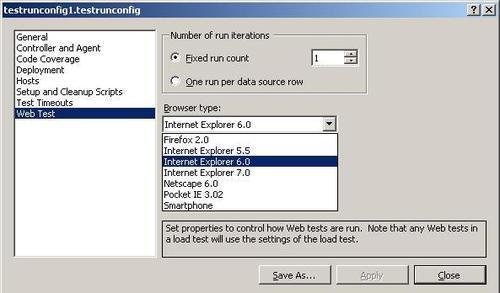
Browser type:
This property is to set the type of browser to use for the requests. The
drop-down contains the list of different browser types to choose. The
screenshot below shows the list of browsers to choose.
Controller and agent
This section is useful
to specify the controller or the location where the tests will be
processed. It can be a local machine or a remote machine. In the case of
remote servers we can also specify the names of any agents required for
hosting the web test.
Code coverage
This section is not very
useful in case of web testing. This is used in Unit testing.
Test timeouts
Sometimes the response for
request might take a very long time. The test application or the user in
real time cannot wait that long to get the response. In this case we
can abort or mark the test as failed, after waiting for a specified
duration. The duration can be specified in seconds or minutes or hours.
If the execution of the test does not complete within the specified
time, then the execution will be stopped and marked as aborted, failed
or both based on the chosen option.
Deployment
Deployment settings
are to specify or select the additional files or assemblies to go along
with the test deployment. This is part of the configuration information
for the test project. To add additional files, open the test
configuration file by double-clicking on the file, which opens the
configuration dialog. Select the additional files or folders using the Add File or Add Directory option in the dialog as shown in the following screenshot:
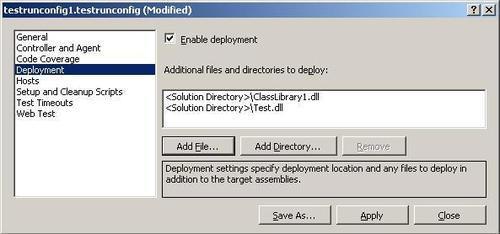
In case of coded web tests, the additional deployment items can be added using the DeploymentItem attribute. For example, the code below shows the deployment of the library files as part of deploying the test application.
[DeploymentItem("Test.dll")]
[DeploymentItem("ClassLibrary1.dll")]
public class WebTest11Coded : WebTest
{
}
Hosts
This specifies the default
host for the test which cannot be hosted by the specified adapters. We
can select either to run in the default host or not to run the test.
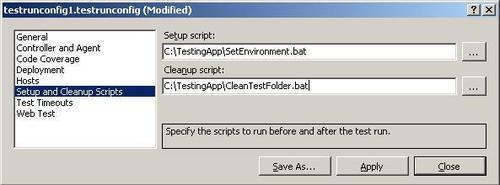
Setup and cleanup scripts
This property is to specify
the script files, which can be used before and after the test. In some
test scenarios, we might have to set the environment for the test using
the setup scripts and in some cases we might have to clean up the
environment by cleaning the files created by the test or the updates
made by the system. This section takes care of setting the scripts to
run. The screenshot below shows the script files that runs before and
after the test run. The SetEnvironment.bat file contains the script which takes care of setting the environment for the test. The CleanTestFolder.bat is the file which contains the script that executes after the test completion to clean up the environment.